

I have been wanting to work more with certificates for some time and finally had both the time and a proper excuse to do just that. In this regard certificates are SSL certificates, and I will look at how to use them with NetApp ONTAP. They are used for SSL signing of https traffic.
I will start by looking at the management traffic for the cluster. Later I might look at management of SVM for Trident and data access for S3.
Management interface for ONTAP
Let’s start with the certificate for the cluster management. There is a self-signed server certificate installed in ONTAP on the cluster SVM by default, and most will not touch that for the first year and then only because they will get a warning that it has expired and now they need to do something. Let’s do the right thing and replace it with a signed certificate.
With self-signed
Before we start, this is how it looks today. From the browser on my jumphost

In ONTAP we can look at the certificate used for SSL.
netapp01::> security ssl show -vserver netapp01

                                                       Vserver: netapp01
                                 Server Certificate Issuing CA: netapp01
                              Server Certificate Serial Number: 170E404A6031AFAC
                                Server Certificate Common Name: netapp01
                             SSL Server Authentication Enabled: true
                             SSL Client Authentication Enabled: false
         Online Certificate Status Protocol Validation Enabled: false
              URI of the Default Responder for OCSP Validation:
Force the Use of the Default Responder URI for OCSP Validation: false
                                      Timeout for OCSP Queries: 10s
               Maximum Allowable Age for OCSP Responses (secs): unlimited
      Maximum Allowable Time Skew for OCSP Response Validation: 5m
                               Use a NONCE within OCSP Queries: true
It is a self-signed certificate, and that is why we see the error in the browser.
Creating the certificate
The first task is to get a hold of the server certification. If you don’t handle that part of the infrastructure yourself submit a request and wait to get the certificate back. We will be using a simple SSL server certificate for Webservers.
But if you do handle it, and you use the same Certificate Authority (CA) as I do, here is how I did it.
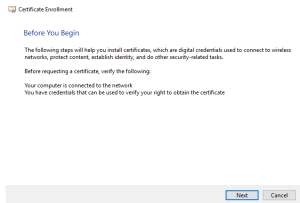
Open an MMC console
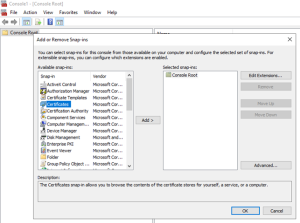
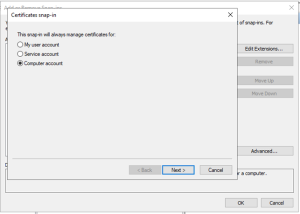
Add as computer account
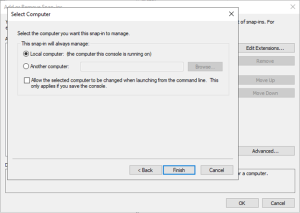
Point to your CA server (I use local computer as I started MMC from my CA)
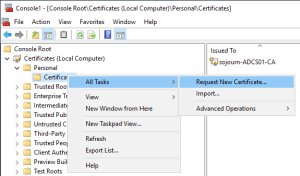
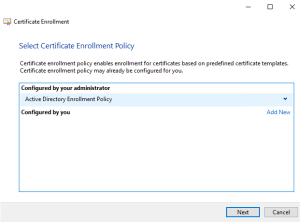
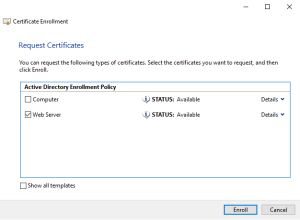
Request a new certificate
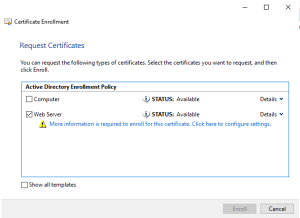
Choose any template that will give you a certificate used for SSL / Webservers. And click the blue line
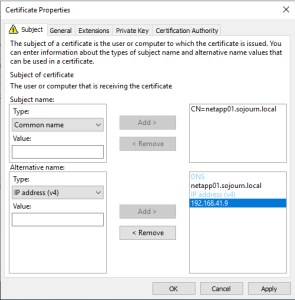
As a minimum fill the CN and DNS. (cn should be FQDN)
Fill out as much as you like.
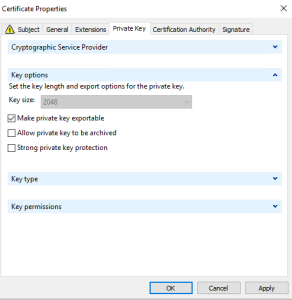
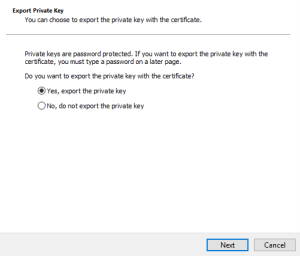
It is important to make the private key exportable as we need them to install the certificate in ONTAP
NB: Keysize is configured in the certificate template.
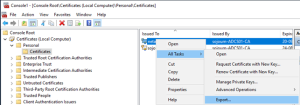
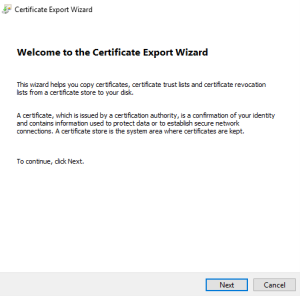
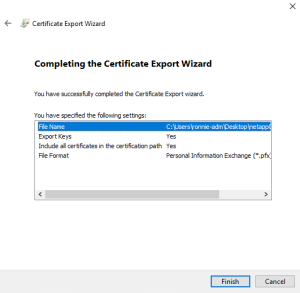
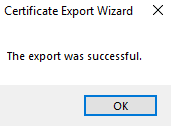
Exporting the certificate
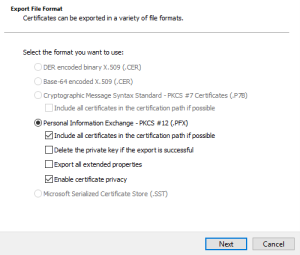
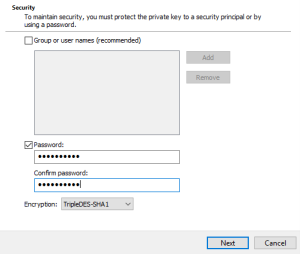
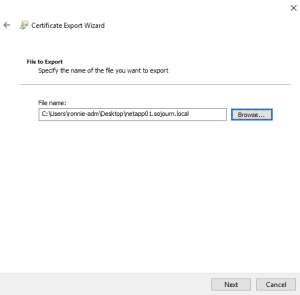
After the certificate has been created you need to export so it can be installed in ontap.
As we need the private keys as well export it as pfx, we will then need openssl to convert from pfx to pem
Convert from pfx to pem
Now we need to convert from pfx to pem, so we can read it directly. We need to manually paste it into ONTAP through the console. Here I use my unix admin host to convert it We convert it from pkcs12 to pem and we export the whole chain. We know it is pkcs12 format as that is what we chose during the export.
ronnie@ubntsojourn01:~$ openssl pkcs12 -in netapp01.sojourn.local.pfx -out netapp01.sojourn.local.pem -nodes
Enter Import Password:
ronnie@ubntsojourn01:~$ cat netapp01.sojourn.local.pem
Bag Attributes
Microsoft Local Key set:
localKeyID: 01 00 00 00
Microsoft CSP Name: Microsoft RSA SChannel Cryptographic Provider
friendlyName: te-WebServer-23eb25d9-2045-418e-8156-5e6c82808fa8
Key Attributes
X509v3 Key Usage: 10
-----BEGIN PRIVATE KEY-----
snip
-----END PRIVATE KEY-----
Bag Attributes
localKeyID: 01 00 00 00
subject=CN = netapp01.sojourn.local
issuer=DC = local, DC = sojourn, CN = sojourn-ADCS01-CA
-----BEGIN CERTIFICATE-----
snip
-----END CERTIFICATE-----
Bag Attributes:
subject=DC = local, DC = sojourn, CN = sojourn-ADCS01-CA
issuer=DC = local, DC = sojourn, CN = sojourn-ADCS01-CA
-----BEGIN CERTIFICATE-----
snip
-----END CERTIFICATE-----
Install certificate in ONTAP
Now we are ready to install it in ONTAP
netapp01::> security certificate install -vserver netapp01 -type server
Please enter Certificate: Press when done
-----BEGIN CERTIFICATE-----
snip
-----END CERTIFICATE-----
Please enter Private Key: Press when done
-----BEGIN PRIVATE KEY-----
snip
-----END PRIVATE KEY-----
Enter certificates of certification authorities (CA) which form the certificate chain of the server certificate. This starts with the issuing CA certificate of the server certificate and can range up to the root CA certificate.
Do you want to continue entering root and/or intermediate certificates {y|n}: y
The root and intermediate certificates can also manually be added as type server-ca but here we will add them as server-chain and link it to this server certificate.
Please enter Intermediate Certificate: Press when done
-----BEGIN CERTIFICATE-----
snip
-----END CERTIFICATE-----
Do you want to continue entering root and/or intermediate certificates {y|n}: n
You should keep a copy of the private key and the CA-signed digital certificate for future reference.

The installed certificate's CA and serial number for reference:
CA: sojourn-ADCS01-CA
serial: 280000000B6F367A77DC81908A00000000000B
Change SSL config in ONTAP
The certificate has been installed and we are ready to change the SSL config to use the new certificate
netapp01::> security certificate show -serial 280000000B6F367A77DC81908A00000000000B -instance -type server
Vserver: netapp01
Certificate Name: netapp01.sojourn.local_280000000B6F367A77DC81908A00000000000B
FQDN or Custom Common Name: netapp01.sojourn.local
Serial Number of Certificate: 280000000B6F367A77DC81908A00000000000B
Certificate Authority: sojourn-ADCS01-CA
Type of Certificate: server
Size of Requested Certificate(bits): 2048
Certificate Start Date: Tue Sep 27 13:52:44 2022
Certificate Expiration Date: Thu Sep 26 13:52:44 2024
Public Key Certificate: -----BEGIN CERTIFICATE-----
snip
-----END CERTIFICATE-----
Country Name (2 letter code):
State or Province Name (full name):
Locality Name (e.g. city):
Organization Name (e.g. company):
Organization Unit (e.g. section):
Email Address (Contact Name):
Protocol: SSL
Hashing Function: SHA256
Subtype: -
netapp01::> security ssl modify -vserver netapp01 -ca sojourn-ADCS01-CA -serial 280000000B6F367A77DC81908A00000000000B -common-name netapp01.sojourn.local
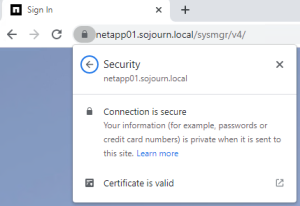
Now the ssl certificate has been installed and if we once again access the website from a browser. Here I use Chrome. Chrome uses windows certstore and as my jumphost is on the same domain as my CA it is trusted, and it works as we would like.
Firefox will most likely still complain as it keeps its own certstore and don’t use windows certstore per default.
Either change that
https://support.mozilla.org/en-US/questions/1197635
or add the CA to firefox.
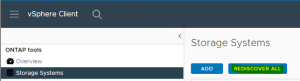
Integration with other NetApp tools
This is part is only relevant if the other NetApp tools talk with Cluster management and not directly with and SVM management lif.
ActiveIQ will keep the connection to the cluster management. No need to rediscovery.
NetApp ONTAP tools (for VMware) will need to rediscover storage systems.
Snapcenter Plugin for VMWare vSphere will keep the connection. No need to do anything
Snapcenter will keep the connection. No need to do anything.